Different Things to Use to Make Mosaic Art From
Old CDs and DVDs that no longer function are such a waste material to throw out, specially if you consider that they can still be used for something else or turned into something new. 1 of the best means yous tin can make employ of erstwhile CDs and DVDs is past using them to brand mosaic projects. You tin can use mosaic from CDs and DVDs to decorate your table, or guitar, or birdbath or every bit a backsplash in your kitchen. Truly, there is an endless manner you can reap the benefits of knowing how to create mosaic out of quondam discs. Although there is no one way to practice it and it by and large depends on what you're decorating with mosaic, the main concept is basically the aforementioned. Here's how to make mosaic projects out of quondam CDs and DVDs.
Step 1 – Choosing your disc
Any old CD or DVD will piece of work simply if you're making the mosaic project for something special, y'all might want to consider which disc yous use. The back of DVDs, the part that will exist used, are more colourful than CDs then you might desire to utilise DVDs alone.
You might too want to use discs that are less scratched, but those details will not be that obvious in the terminate product unless you look for them.
Step 2. Cutting the disc
Cutting the disc can be quite a challenge, especially for thick discs like DVDs. Some CDs are thin enough that you tin can cut them using a sharp pair of scissors. However, for thick discs, you have to separate the colourful layer first from the other layers earlier yous tin cut information technology. Otherwise, the disc would merely end up great, or the colourful layer volition stick on one of the other layers and volition become unusable. Hither's how you can cutting thick discs:
- Oestrus the disc with a hairdryer ready on the hottest setting. The disc volition get really hot so to avoid burning your fingers, hold it by its edge or gear up it on a pot-holder. If you don't have a blowdryer, you can estrus information technology under the sun, gently on peak of a flame, or on the oven.
- Separate the disc into two layers. You tin can use a butter knife to make it easier.
- Use your scissors to cut the colourful layer into small pieces. You lot can discard the other layer equally it will no longer be used.
You don't have to worry about the shape or size of the pieces you lot cutting. Split the smaller pieces from the larger ones so y'all can use it to fill the gaps later on.
Step 3. Protect the pieces
The shiny, colourful stuff from the discs will wash off if yous don't protect it with something first. Place the pieces on top of a cardboard, colourful-side up, and spray them with a clear stop to keep it shiny and colourful for longer.
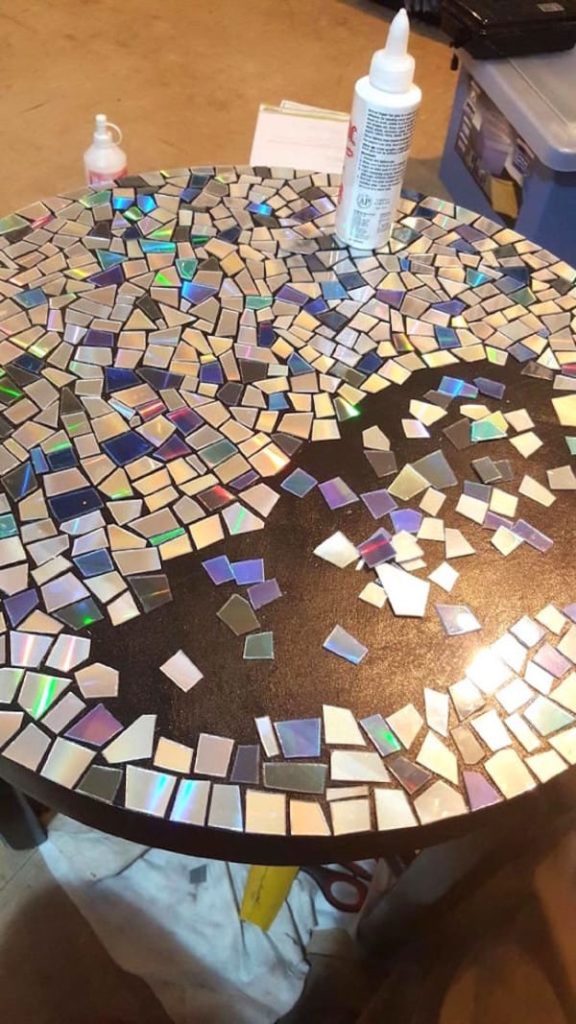
Step 4. Glue on the pieces
Make sure you lot're working on a fairly flat surface. Y'all can use a sandpaper to shine out wooden surfaces or you can utilize epoxy putty to fill in gaps on cemented, hard surfaces. Terminate off the latter with a sander.
Glue the mosaic pieces on the surface using an all-purpose sealant that won't come off even when wet. This is the nigh slow part of the process and may take weeks, depending on how large the surface yous're working on is. Start gluing on i side then piece of work towards the other end.
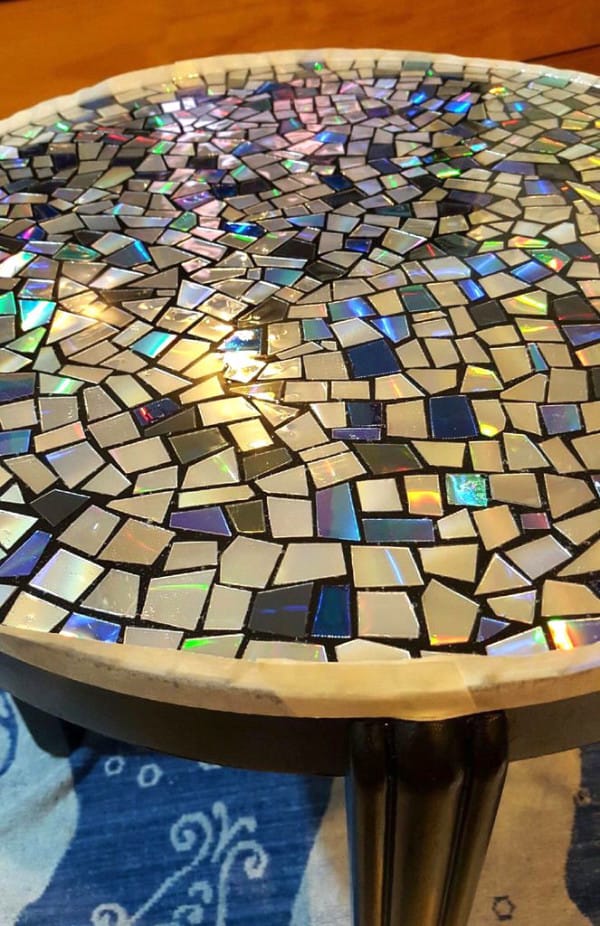
Step v. Grouting
Fill the gaps in betwixt the mosaic disc tiles with any brand of grout you want. Spread the grout all over the tiles until the spaces in between have been filled up to a superlative like to that of the tiles. This way, the edges of the mosaic tiles won't go caught on anything. Make sure y'all follow the manufacturer'south instructions in grouting.
Footstep 6. Stop
After applying the grout, carefully wipe the excess off with a damp rag. You lot should exist left with the shiny, mosaic tile that reflects with dissimilar colours as the light bounces off of it.
Source: https://www.ideadigezt.com/how-to-make-mosaic-projects-out-of-old-cds-and-dvds/
0 Response to "Different Things to Use to Make Mosaic Art From"
Post a Comment