How to Make Imovie Slideshow Continuously Looping

Reader Katie Peterson seeks help with a family issue. She writes:
I've been tasked with creating a looping slideshow to honor a family member. I'm new to the Mac and have no idea how to go about it. Is it difficult?
It's easy with iPhoto '11. After you've imported your images into iPhoto, select the ones you want to include as part of the slideshow. Click the Create button at the bottom of the window and choose Slideshow from the menu that appears. iPhoto will create a new slideshow and place it under the Slideshows heading at the bottom of iPhoto's albums pane on the left side of the iPhoto window. It will be assigned a name (perhaps a date if all the images were tagged with the same date, the name of an album the images were taken from, or a more generic "Photos" title). You're welcome to change that name by entering a new one in the highlighted field.
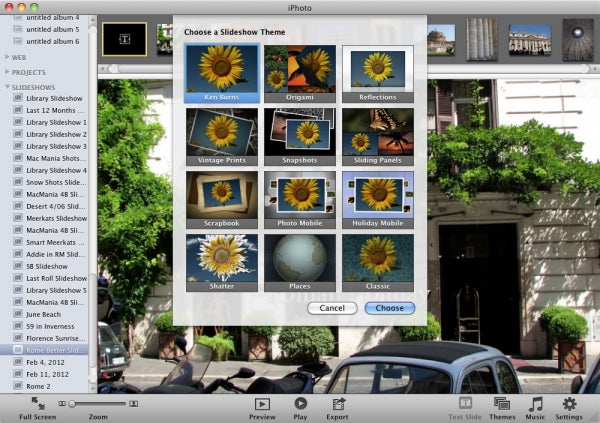
Along the bottom right of the window you'll see Themes, Music, and Settings buttons. Click on the Themes button to assign a theme. Hover your cursor over each theme to get an idea of what the theme's transitions and layout look like. Click Choose to select a theme.
If you'd like to add music to your slideshow, click on the Music button to produce the Music Settings window. Within this window you can choose music to accompany your slideshow. By default, you'll see a list of the music bundled with iPhoto. You can audition any of this music by simply double-clicking on a track name. If you prefer to use music in your iTunes library, click on the Source pop-up menu, select iTunes or an iTunes playlist, and choose some music from your library. You can also create a music playlist so you don't have to hear the same track repeated over and again. To do that enable the Custom Playlist for Slideshow option and drag in the tracks you want to play during the slideshow. Click the Choose button to close the window. If you change your mind and don't want any music, disable the Play Music During Slideshow option within this window.
Click on the Settings button and in the window that appears make sure that the Repeat Slideshow option is enabled. If you'd prefer that the first slide not contain a title, disable the Show Title Slide option. At the top of the window, choose the duration of each slide—3 seconds is the default. Click the window's close button.

Once you've configured the slideshow to your satisfaction, click on the Play button at the bottom of the screen. Your slideshow will play and loop until you press the Mac's Escape key or move your cursor to bring up iPhoto's play controls and click the Close button.
In addition to playing the slideshow in iPhoto you have the option to export it as a movie. To do that, click Export and in the sheet that appears choose an output format—Mobile, Medium, Large, or Display. By default, when you choose a format and click the Export button the slideshow/movie will be sent to iTunes. You can play this movie with QuickTime Player (and loop it there) or within iTunes.
You can also burn it to DVD. You do this by choosing Share -> iDVD within iPhoto. The slideshow will be added to a new iDVD project that you can then burn to disc. If you want the slideshow to repeat when played on the DVD, choose View -> Show Map within iDVD. You'll see the layout of your DVD. Select the slideshow you've added and choose Advanced -> Loop Movie. When you play the slideshow on the burned DVD, it will loop.
If you want to slideshow to start playing as soon as you insert the disc in your DVD player, drag the slideshow to the first box in the map—the one that reads "Drag content here to automatically play when the disc is inserted." Burn the disc, insert it into a DVD player, and your slideshow will start playing and loop, as promised.
Source: https://www.macworld.com/article/214308/create-looping-slideshow.html
0 Response to "How to Make Imovie Slideshow Continuously Looping"
Post a Comment